Using WebP images
Posted 27th July 2020 in Design and Development
In my roundup of the most interesting features announced at WWDC 2020 I mentioned that Safari would now be supporting image aspect ratios. Something else I noticed in their Safari 14 release notes is that WebP would now be supported.
Shortly afterwards, I read a short CSS-Tricks article about WebP support in iOS 14 and I sprung into action!
In the article, Geoff Graham mentions:
WebP is a super progressive format that encodes images in lossless and lossy formats that we get with other image formats we already use, like JPEG, but at a fraction of the file size
It has been around for a long time (Chrome was first, with partial support in 2011 and full support in 2014) but, now that Apple are on board, that’s all the major browsers covered.
So I converted the image on my About page to WebP, taking Geoff Graham’s advice and adding it as an enhancement with <picture>, rather than the default. I don’t want any current Safari users seeing just the alt text!
<picture>
    <source srcset="/assets/img/martin-underhill-tempertemper.webp" type="image/webp" />
<img src="/assets/img/martin-underhill-tempertemper.jpg" alt="Martin Underhill of tempertemper Web Design, holding a cup of tea and looking to his left, smiling." width="800" height="450" />
</picture>
Differences
It’s worth mentioning that WebP images don’t compress the same way as JPEGs do, so there’s no way to do a proper like-for-like comparison. Exporting to WebP and compressing the image until a fraction before I lost too much gave me an image file size of ~15k smaller than the equivalent JPEG, so that’s good.
But if I’m going to give you some examples, we need some kind of control here, so I’ve used file size. I’ve exported the same image as JPEG and WebP to a file size of as close to 52k as I could get (which was the most compression I was happy with for the JPEG).
Here’s the JPEG:

And here’s the WebP:

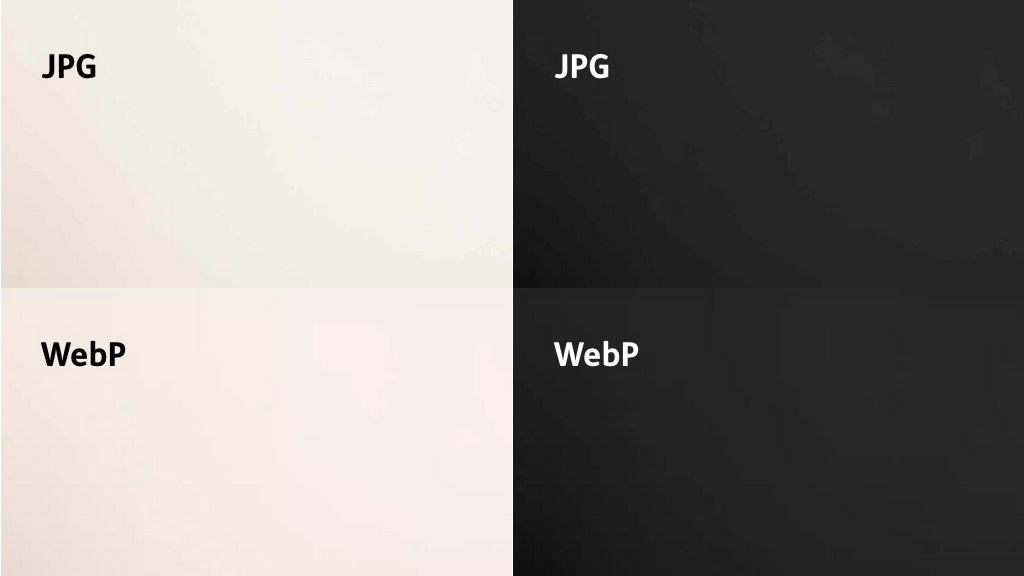
Not a huge difference, but let’s take a closer look, first at the gradient where the light hits the solid-colour wall behind me:

To highlight the gradient, I’ve used greyscale and darkened it; the JPEG gradient is blocky, where the WebP gradient is much more gradual and subtle.
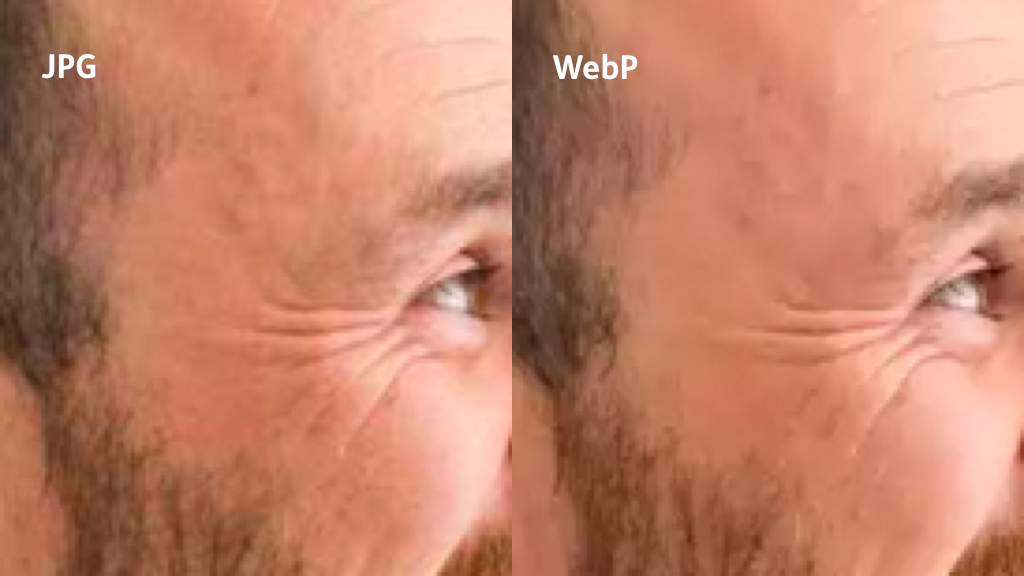
Next, let’s have a look at how each format compresses a face. I’d like to apologise in advance for two things:
- In order to show how a JPEG compares to a WebP, I’ve had to use a PNG, so the image isn’t small: it weighs in at 353K, which is the sort of image size I’d normally avoid like the plague
- The example uses my About page picture again, so you’re going to have to look at my ugly mug…

The JPEG image is more defined, showing more detail, where the WebP (mercifully!) smooths over some freckles and wrinkles.
Is WebP better?
You can get good file size benefits by using WebP, but the compression is visually different to JPEG. In the example in this article, gradients of colour (like the corona of light shining on a solid-colour wall) are much smoother, with fewer artifacts, but there’s a loss in detail in other areas.
So in some ways WebP compression is better than JPEG, in some ways maybe not quite as good. As usual on the web: it depends!
Be sure to export your images in various formats in order to get the right balance between detail, smooth colours and file size.
WebP supports good compression and and alpha (transparent) channel, where with the options we currently have, we’ve got good compression (JPEG) or an alpha channel (PNG).
Once iOS 14 and macOS 11 roll out this autumn, WebP will be an option for all browsers, whether it’s the right choice or not. In the meantime we’ve got the <picture> element to offer WebP as a progressive enhancement.